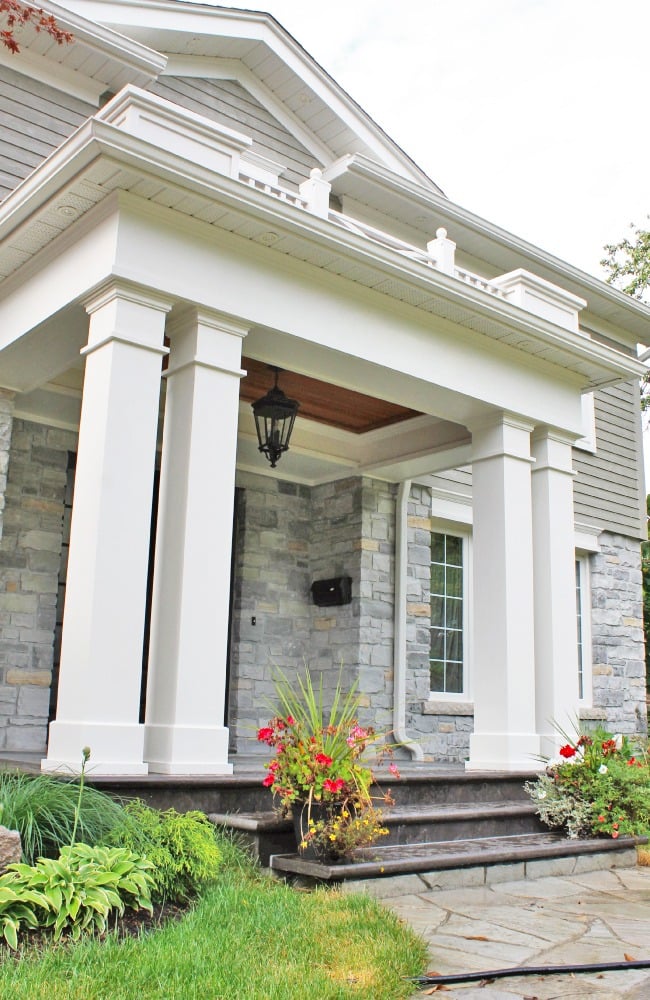

Enhance your home’s aesthetic with the elegant and functional Prestige DIY PVC Structural Brackets. These decorative elements not only level up your place’s visual appeal but also provide essential structural support for your home!
In this comprehensive guide, we’ll walk you through the entire installation process, ensuring a flawless and professional finish. Whether you’re a seasoned DIY enthusiast or a beginner, our clear, step-by-step instructions will make the installation simple and stress-free. Ready to transform your space? Let’s dive in!
What is a Structural Bracket For?
A structural bracket is a crucial component in both interior and exterior home improvement projects, designed to provide support and stability to various structures. These brackets are typically used to reinforce shelves, countertops, overhangs, and even pergolas, ensuring that these elements can bear weight and remain secure over time.
Made from durable materials such as steel, aluminum, or heavy-duty plastic, structural brackets are engineered to withstand substantial loads, preventing sagging and potential damage. They are often installed in areas where additional support is needed, complementing the aesthetic appeal of your home while serving a practical function.
In addition to their structural benefits, these brackets also offer decorative value. Available in a wide range of styles and finishes, they can enhance the visual appeal of your space, seamlessly blending with your existing decor. Whether you’re aiming for a modern, industrial look or a more traditional, ornate design, there is a structural bracket to suit your needs.
Tools And Materials for Installing Your Structural Brackets
Before starting your shutters DIY installation, you’ll need to gather the following tools and materials:
Tools You’ll Need:
- Tape Measure: For accurate measurements
- Pencil: To mark cutting and drilling points
- Level: To ensure your shutters are perfectly aligned
- Nail Gun: For fixing nails in place
- Screw Gun: For efficient screw driving
- Prestige DIY Installation Guide: For further guidance
10 Steps for A Fool-proof Structural Bracket Installation
By combining strength and style, structural brackets provide an effective solution for both reinforcing and beautifying your home. Here’s how to install them in 10 easy steps!
Step 1: Define and Mark the Location

Step 2: Install the PVC Installation Plate
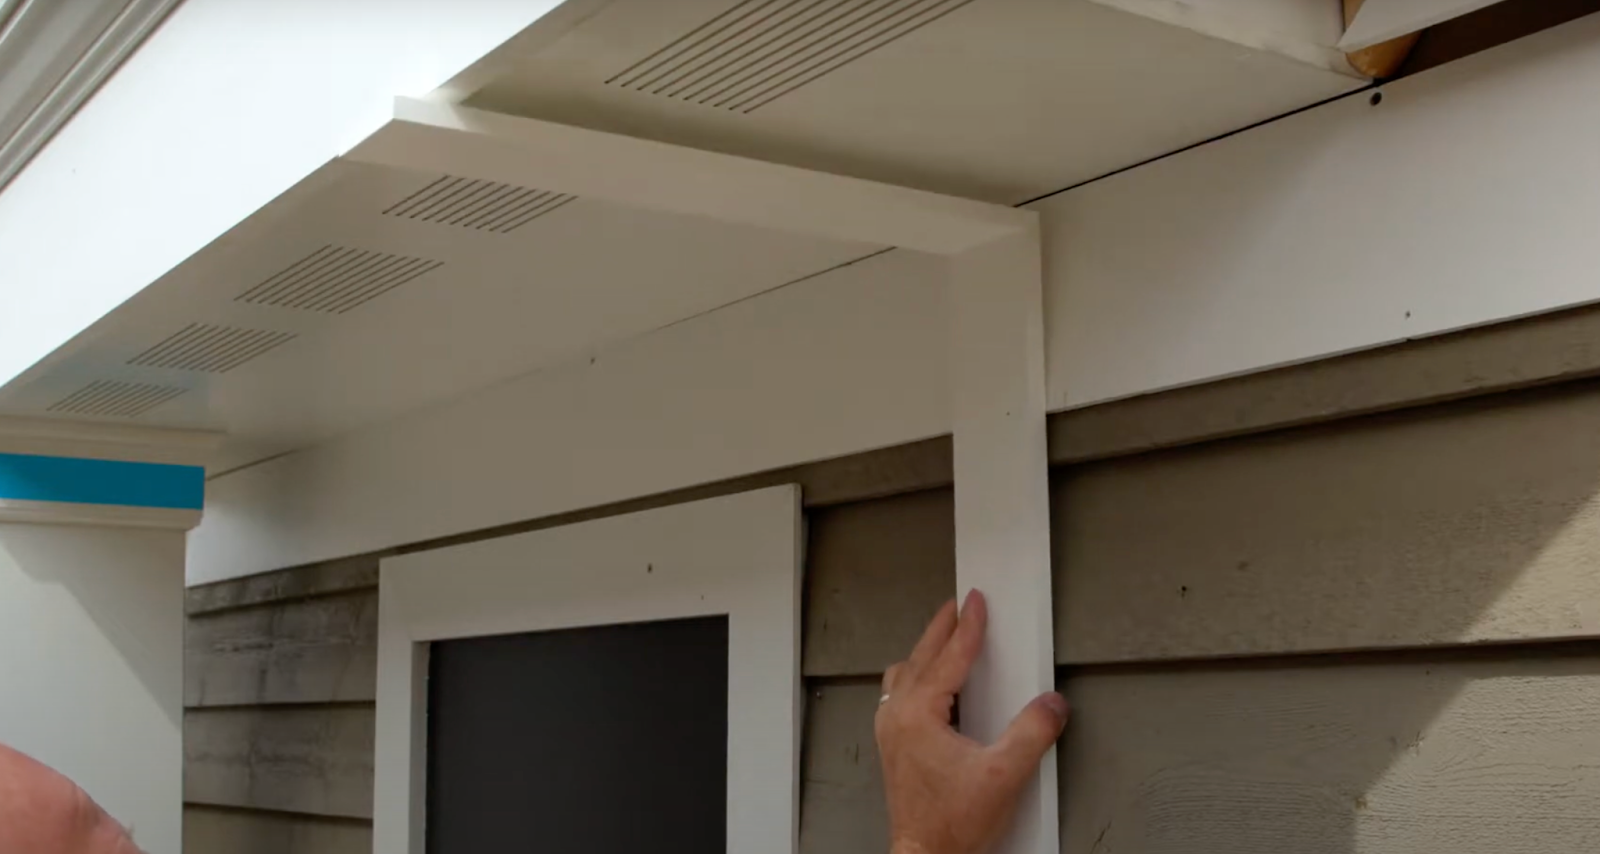
Step 3: Level the PVC Plate
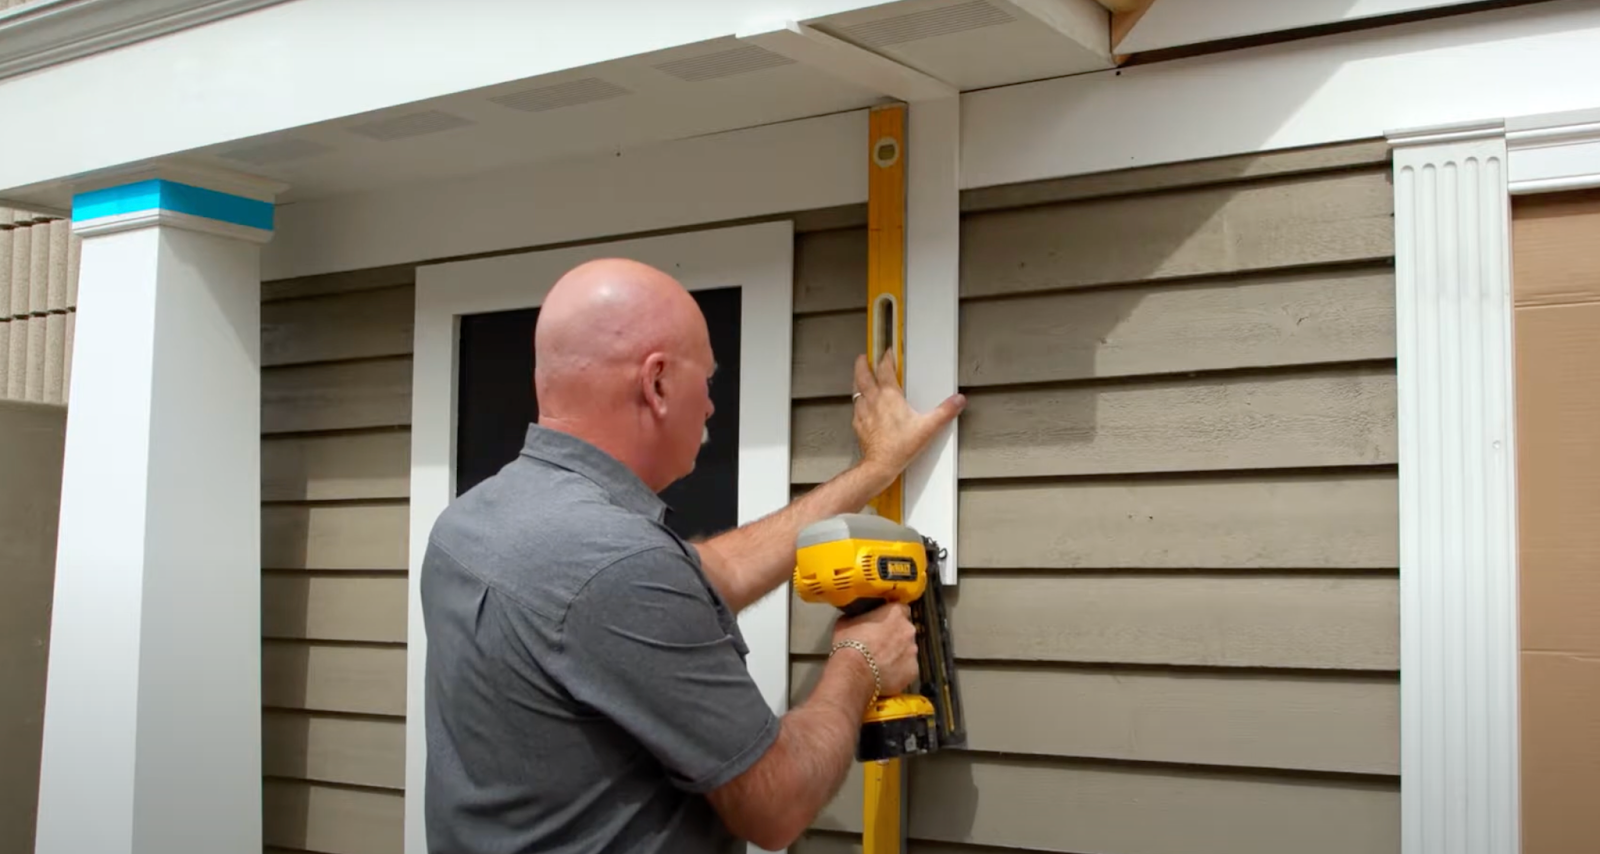
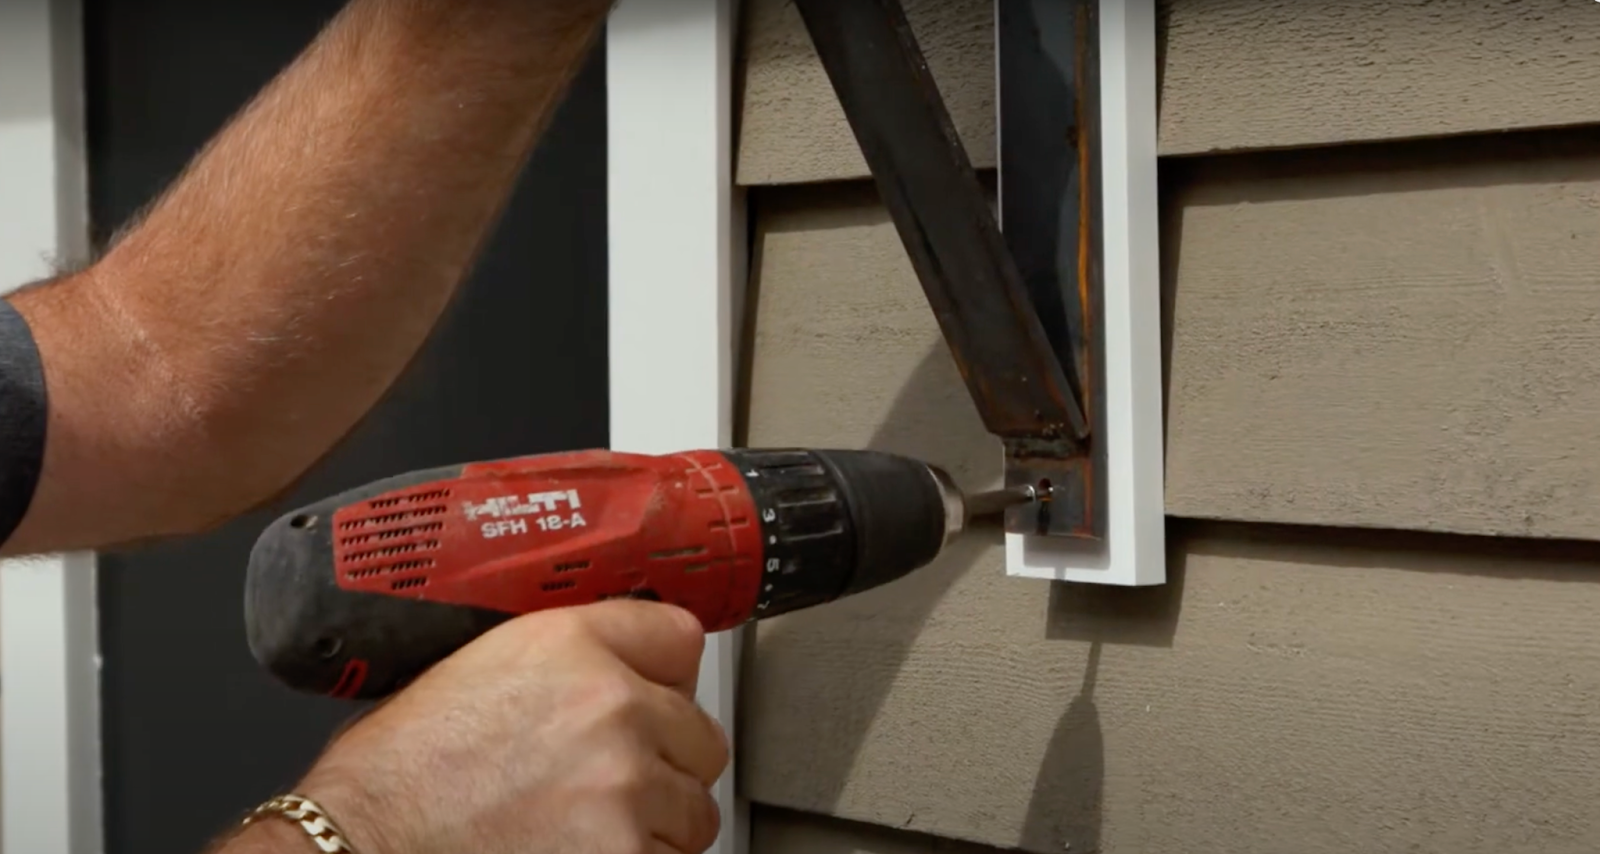
Step 4: Position and Screw in the Steel Structure
Step 5: Remove the Inner Bracket Piece
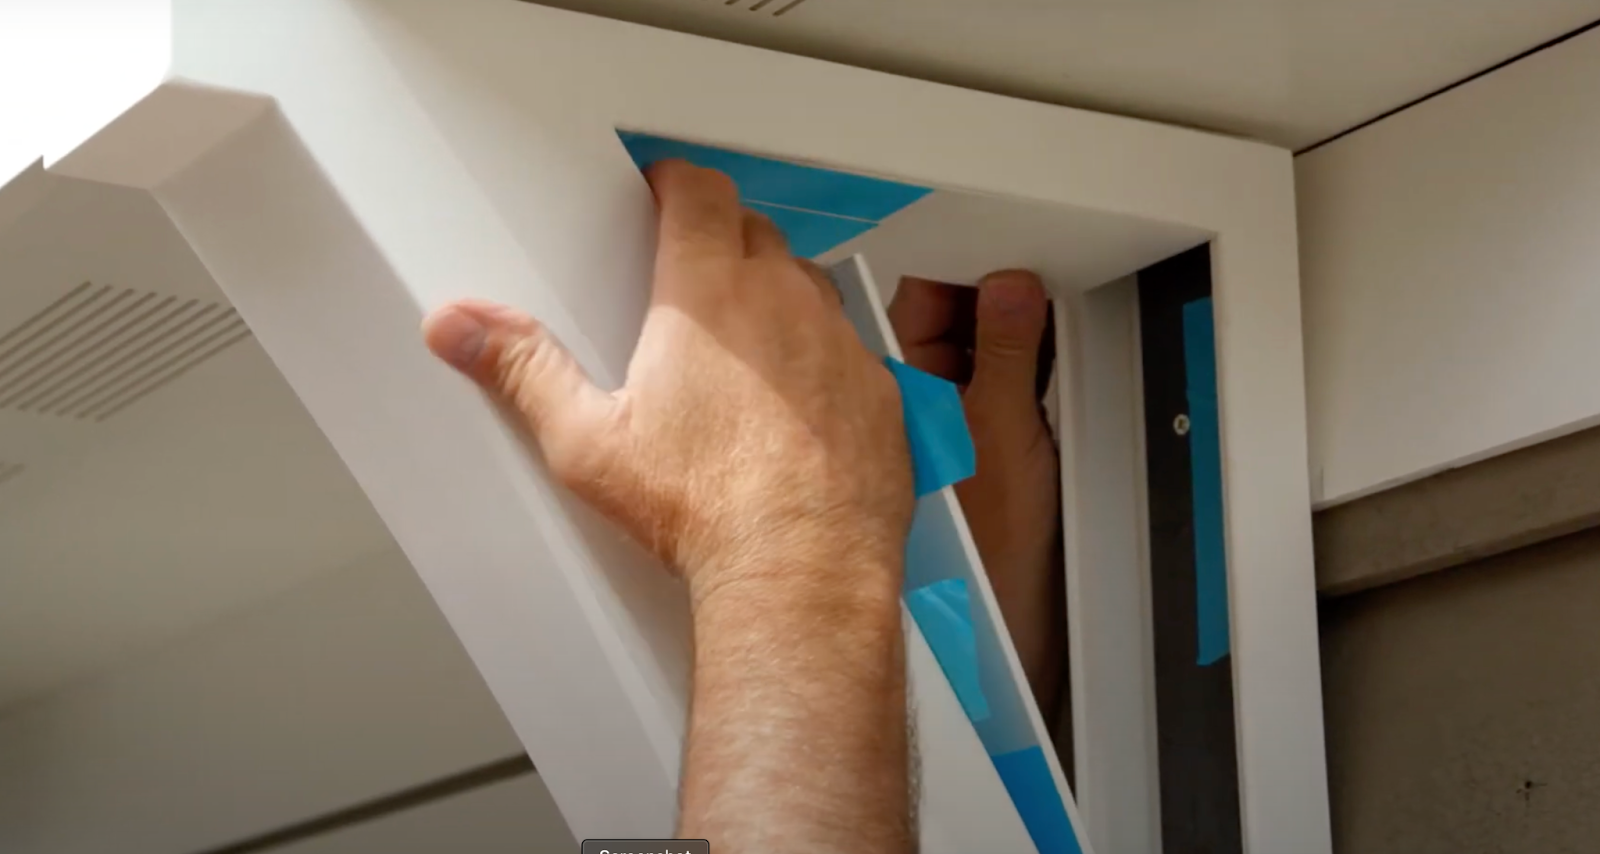
At the Prestige DIY factory, we have not glued the inner part of the structural bracket piece into position so you can easily remove the panels by peeling back the tape and taking out the piece.
We have also marked the swing piece so you can locate the inner section. Put aside the inner part later for now, we’ll get back to it later.

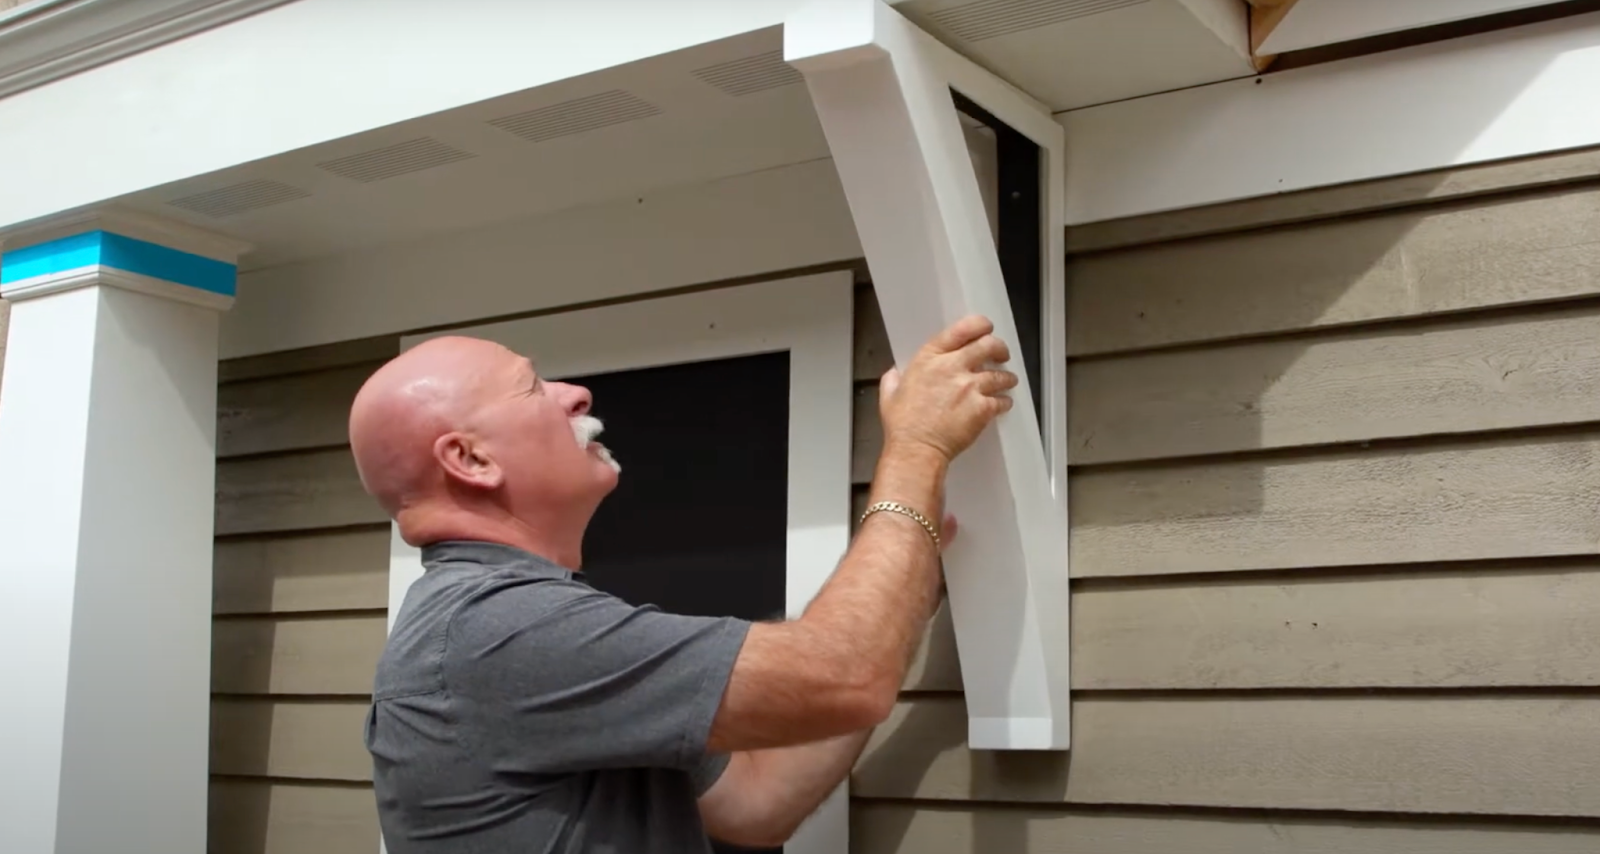
Step 6: Fit the Bracket Piece Over the Steel Frame
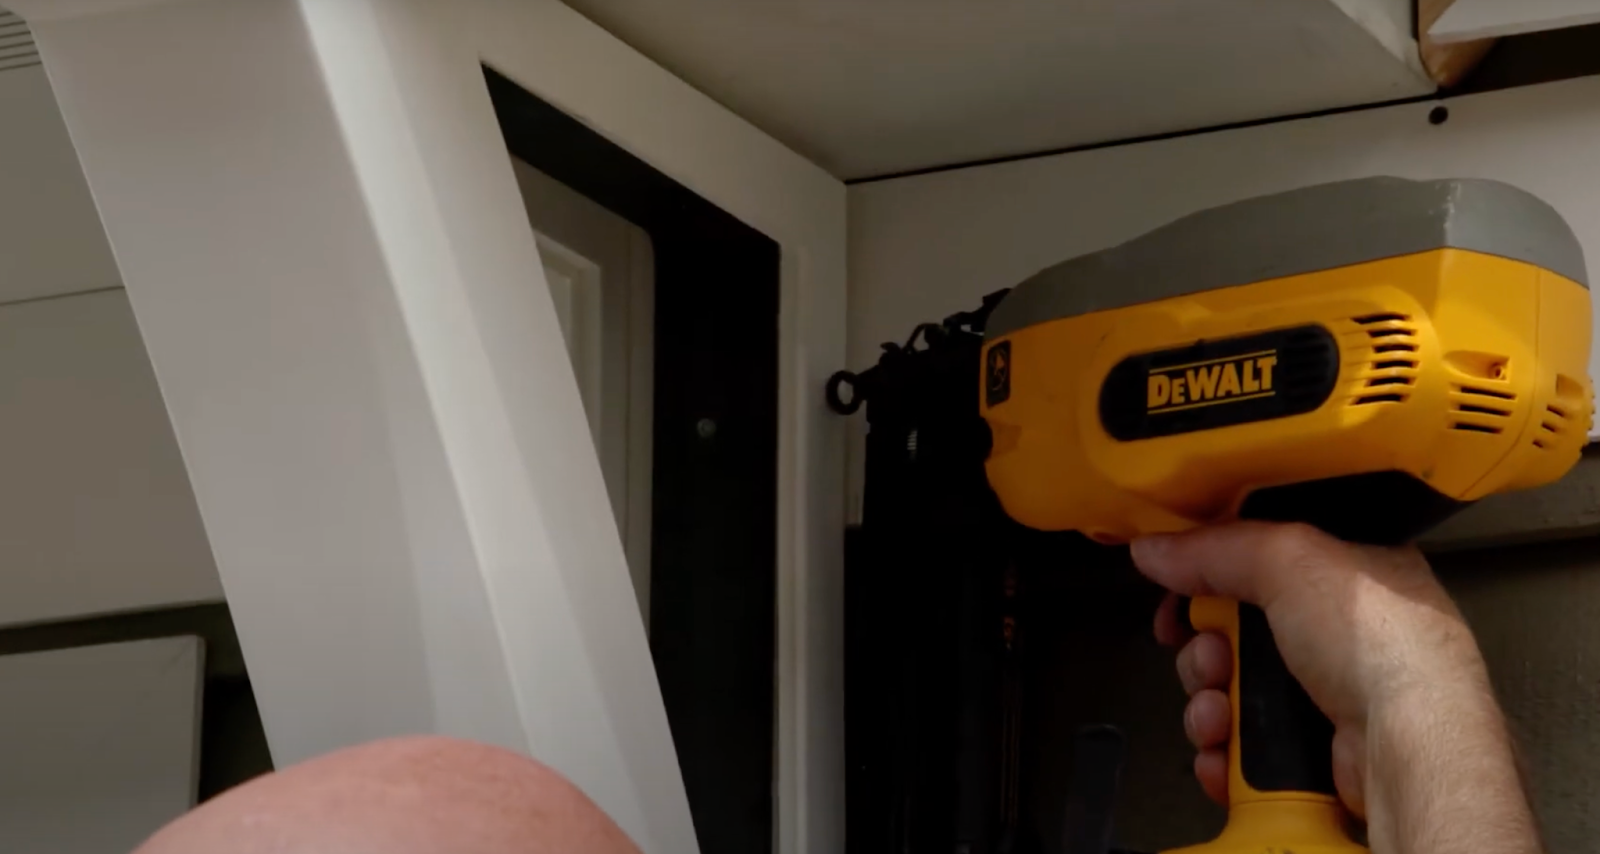
Step 7: Use the Nail Gun on the Sides
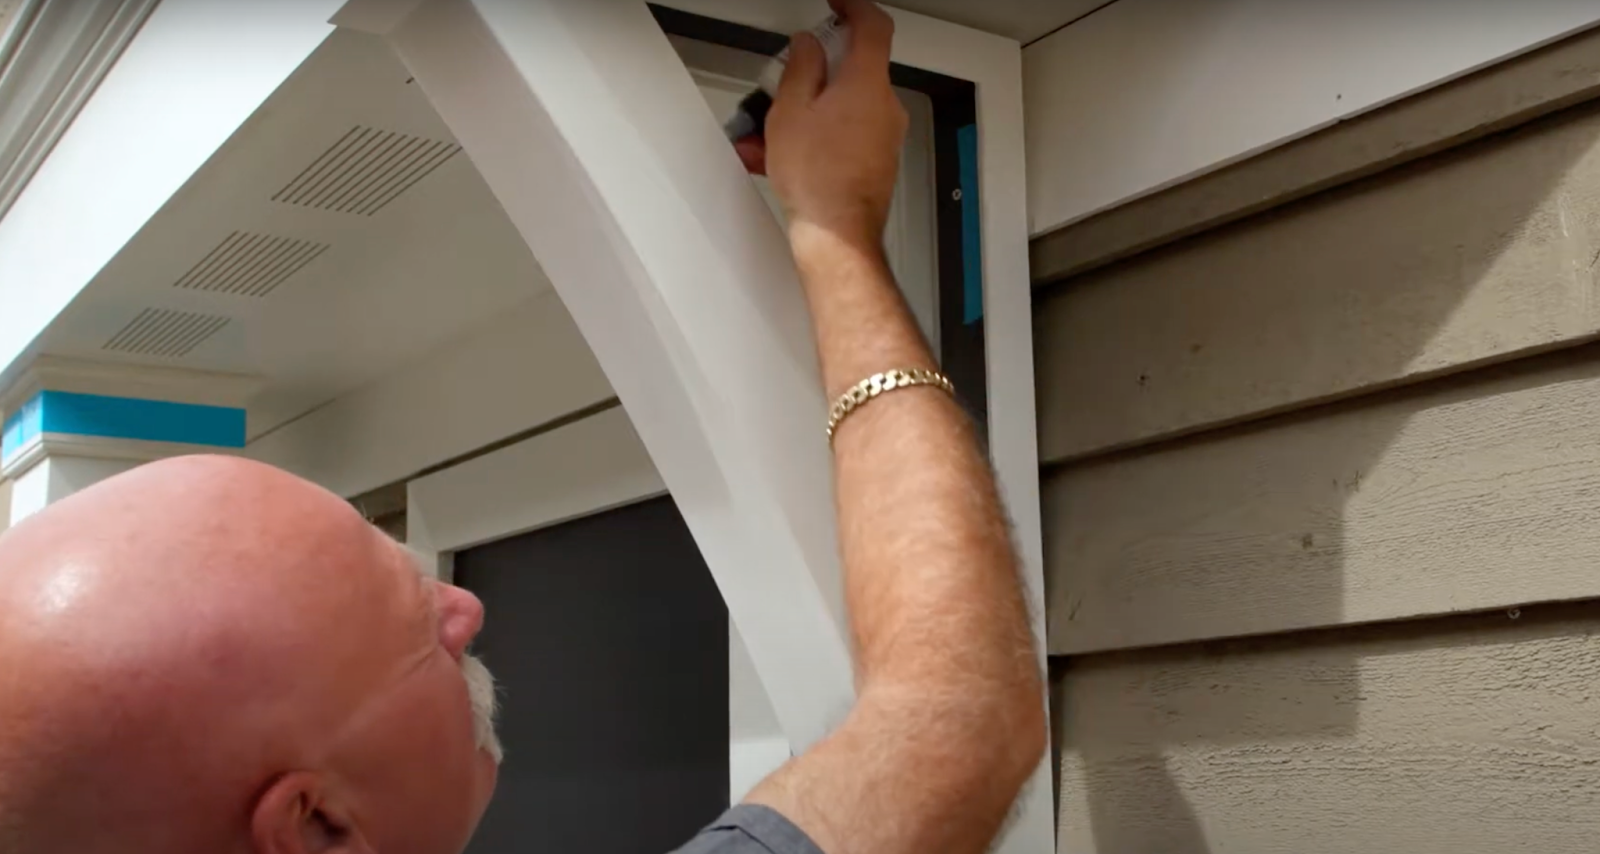
Step 8: Apply PVC Adhesive to the Inner Part of the Bracket
Step 9: Align the Inner Bracket Into Place
Step 10: Wait for 30 minutes
After the adhesive has set, typically around thirty minutes, remove the tapes around the bracket. You can also sand off any excess adhesive or rough spots using 300-grit sandpaper for a smoother finish.
Congratulations, you’ve successfully DIYed your Prestige DIY structural bracket installation! This decorative and functional addition enhances both the look and strength of your home, making them an essential element in any DIY home improvement toolkit.
Install Structural Brackets On Your Own
Add a professional touch to your home with Prestige Structural Brackets. Browse our selection of high-quality DIY PVC products and find everything you need for your bracket installation project. For more information or assistance, contact Prestige DIY Products today!


