

DIY Gable Installation: A Step-by-Step Guide
Whether you’re a seasoned DIY enthusiast or just starting out, our clear and straightforward instructions are designed to help you achieve a professional-looking gable installation with ease. With the right tools and our detailed step-by-step approach, you’ll be able to enhance the aesthetic appeal of your home in no time. Let’s get started on transforming your space!
What is a Gable?
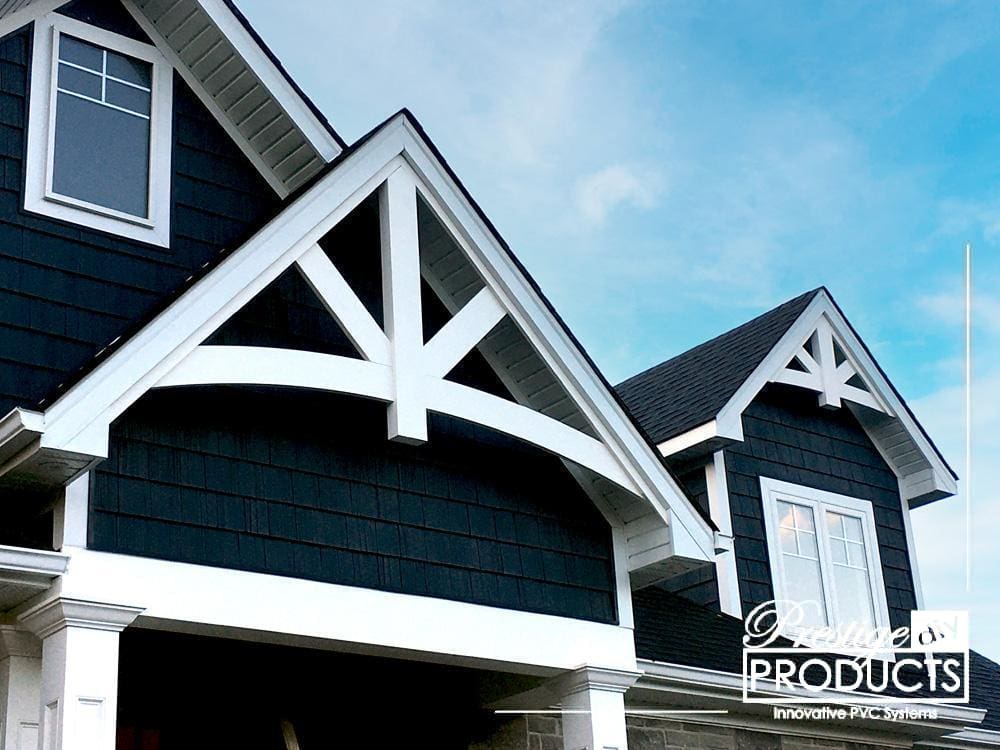
A gable refers to the triangular portion of a wall between the edges of a sloping roof. It is typically found at the end of a building, where the roof slopes down to meet the wall. The gable serves both functional and aesthetic purposes, contributing to the structural stability of the building while also enhancing its visual appeal. It is a prominent feature in various architectural styles and is often used to create a distinctive and attractive facade.
Gables can be designed in different styles and shapes, such as the classic triangular gable, the curved gable, or the decorative gable with intricate detailing. The design of a gable can influence the overall look of a building, providing a focal point and complementing the roofline.
Can I DIY a Gable Installation?
Yes, you can DIY a gable installation with the right tools, materials, skills, and guidance. Many homeowners find that with proper preparation and attention to detail, installing a gable, such as those available from Prestige DIY Products, can be a manageable project.
What Do I Need For a DIY Gable Installation?
Before diving into the specifics, it’s important to gather and organize everything you’ll need for a successful DIY gable installation. Proper preparation is key to ensuring a smooth process and achieving a professional finish.
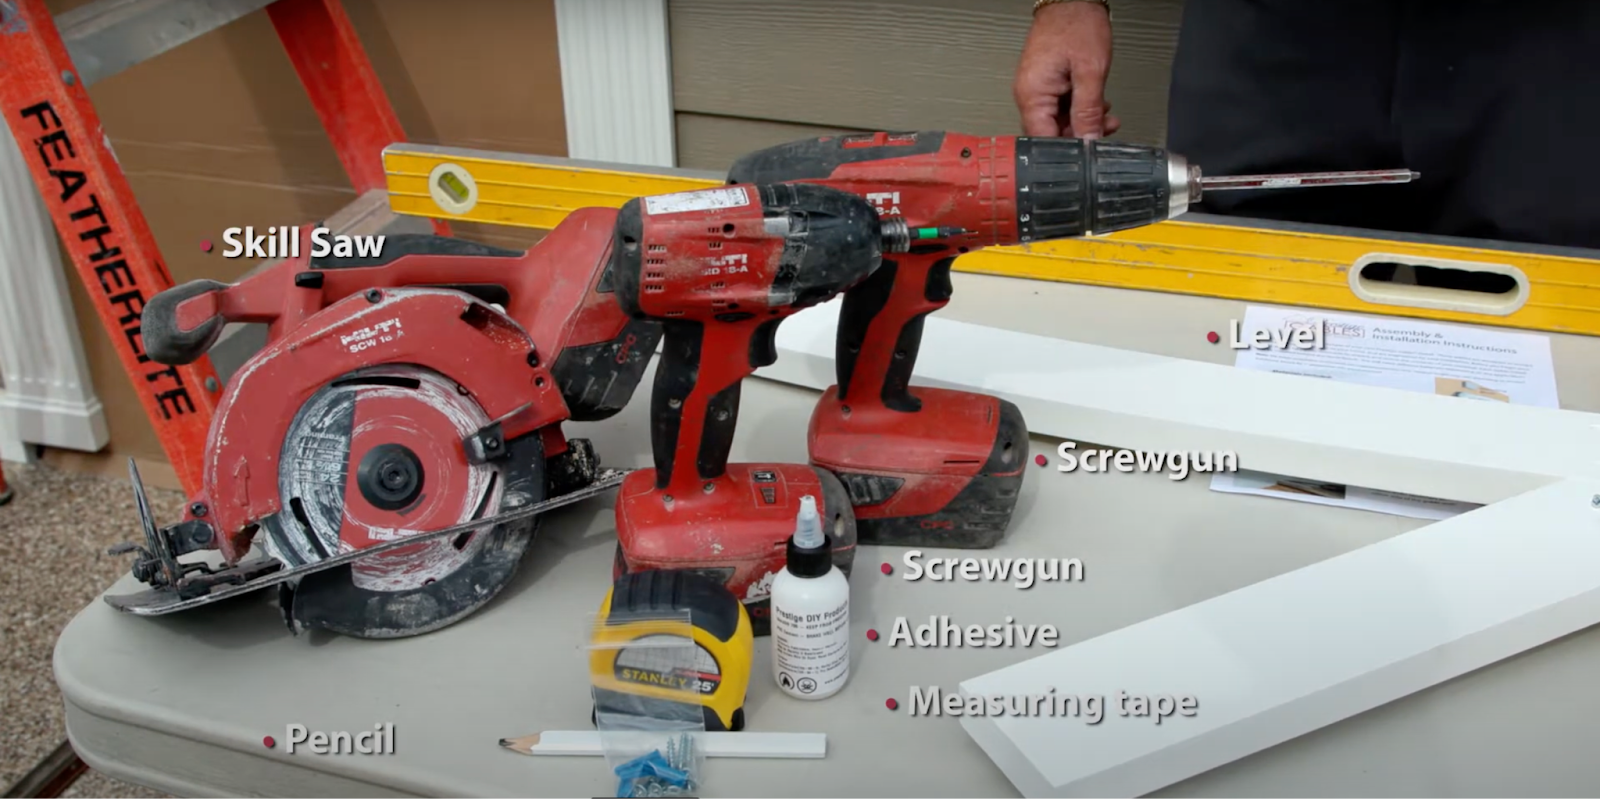
Here Are The Tools You’ll Need:
- Tape measure
- Pencil
- Adhesive
- Two screw guns (with number six and number eight Robertson heads)
- Skill saw
- Level
These Ones Are Included in Your Prestige DIY Gable Package:
- Fasteners for assembling the product
- Detailed installation instructions
Our gable detail kits come with everything you need to get started, ensuring you have the proper components and guidelines right at your fingertips. The included fasteners are specifically chosen to provide a secure and durable installation, while the detailed instructions are crafted to guide you through each step with clarity and precision. We believe that a successful DIY project starts with the right materials and a clear plan, and we’ve got you covered on both fronts.
Step-by-Step Gable Installation Guide
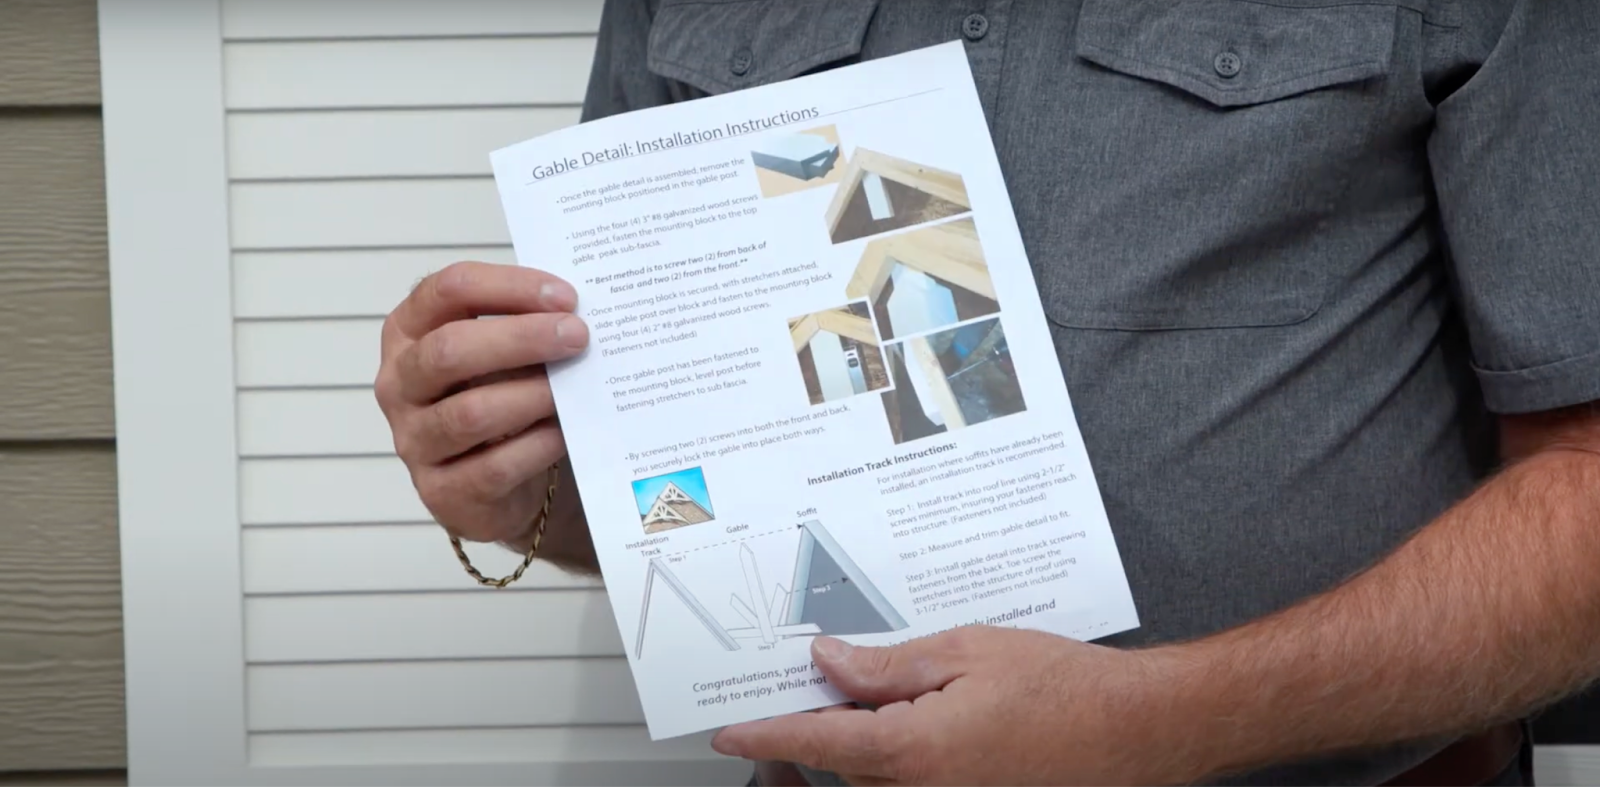
Step 1: Review the Installation Instructions
Before you begin, carefully review the installation instructions provided in your package. These instructions are your roadmap to a successful installation. They detail the layout and assembly process, ensuring that you understand each step before you start.
Taking the time to familiarize yourself with the instructions can prevent mistakes and save time in the long run. You’ll get an overview of the entire process, from preassembly to final adjustments, and you’ll know what tools and materials you’ll need at each stage. This preparation will help you work more efficiently and with greater confidence.
Make sure to note any special tips or warnings highlighted in the instructions. These can provide valuable insights into potential challenges you might face and how to overcome them. By thoroughly understanding the installation instructions, you’ll be better equipped to handle any issues that arise, leading to a smoother and more successful project.
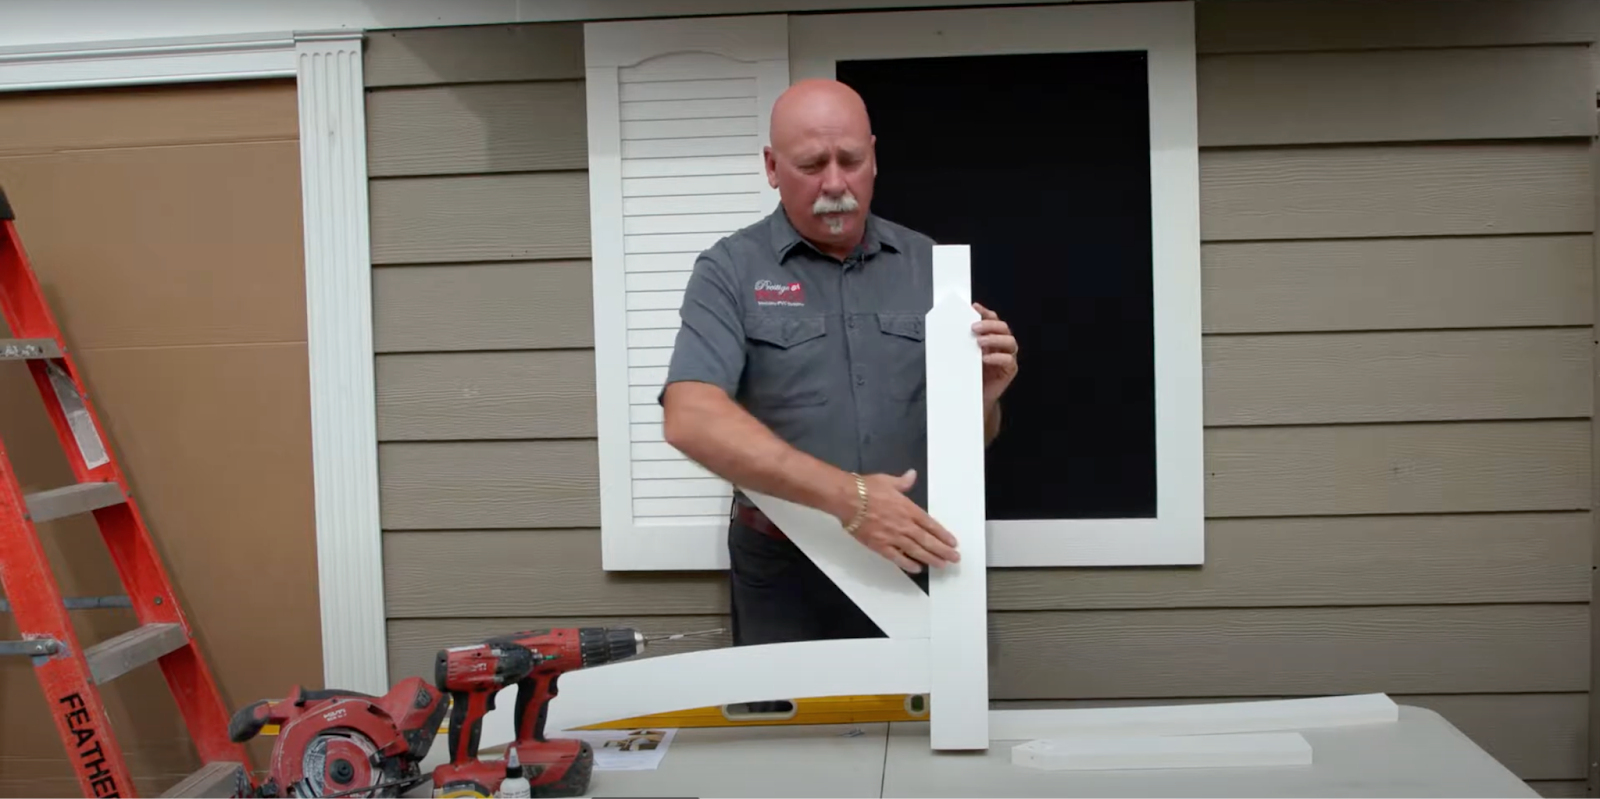
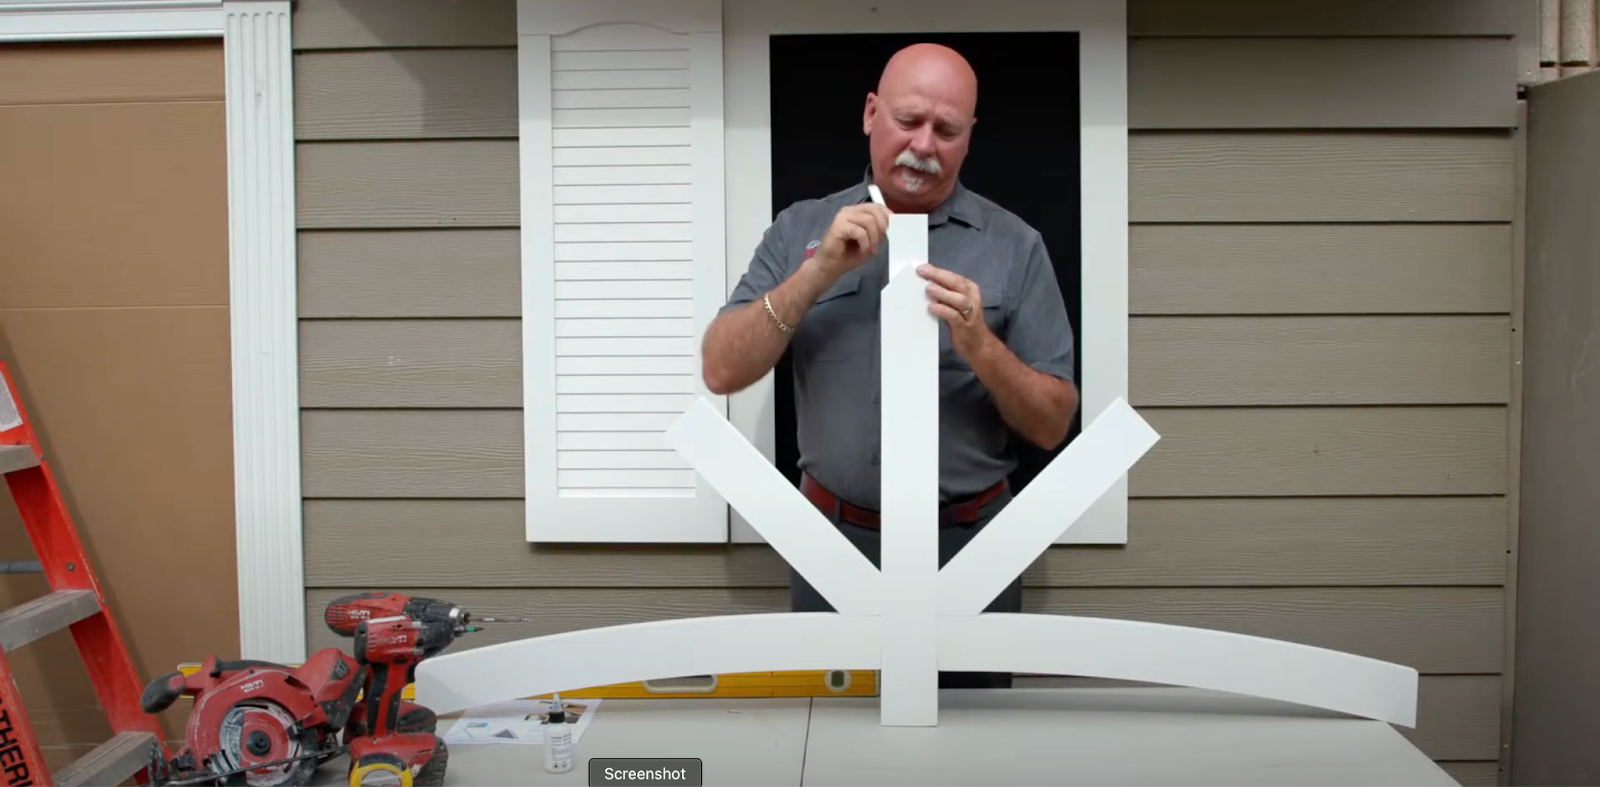
Step 2: Preassemble the Gable Detail
For your convenience, we have already preassembled several key parts of the gable detail:
- Stretcher: This horizontal piece connects the vertical posts and provides structural stability to the gable.
- V Section: The V-shaped component that adds to the aesthetic appeal and structural integrity of the gable.
- Vertical Posts: These posts provide the vertical support needed for the gable structure.
- Installation Stem: This component aids in the secure attachment of the gable detail to the building.
For this sample, we have preassembled the gable details in the “C configuration.” The screws would go in the provided fasteners for the installation stem.
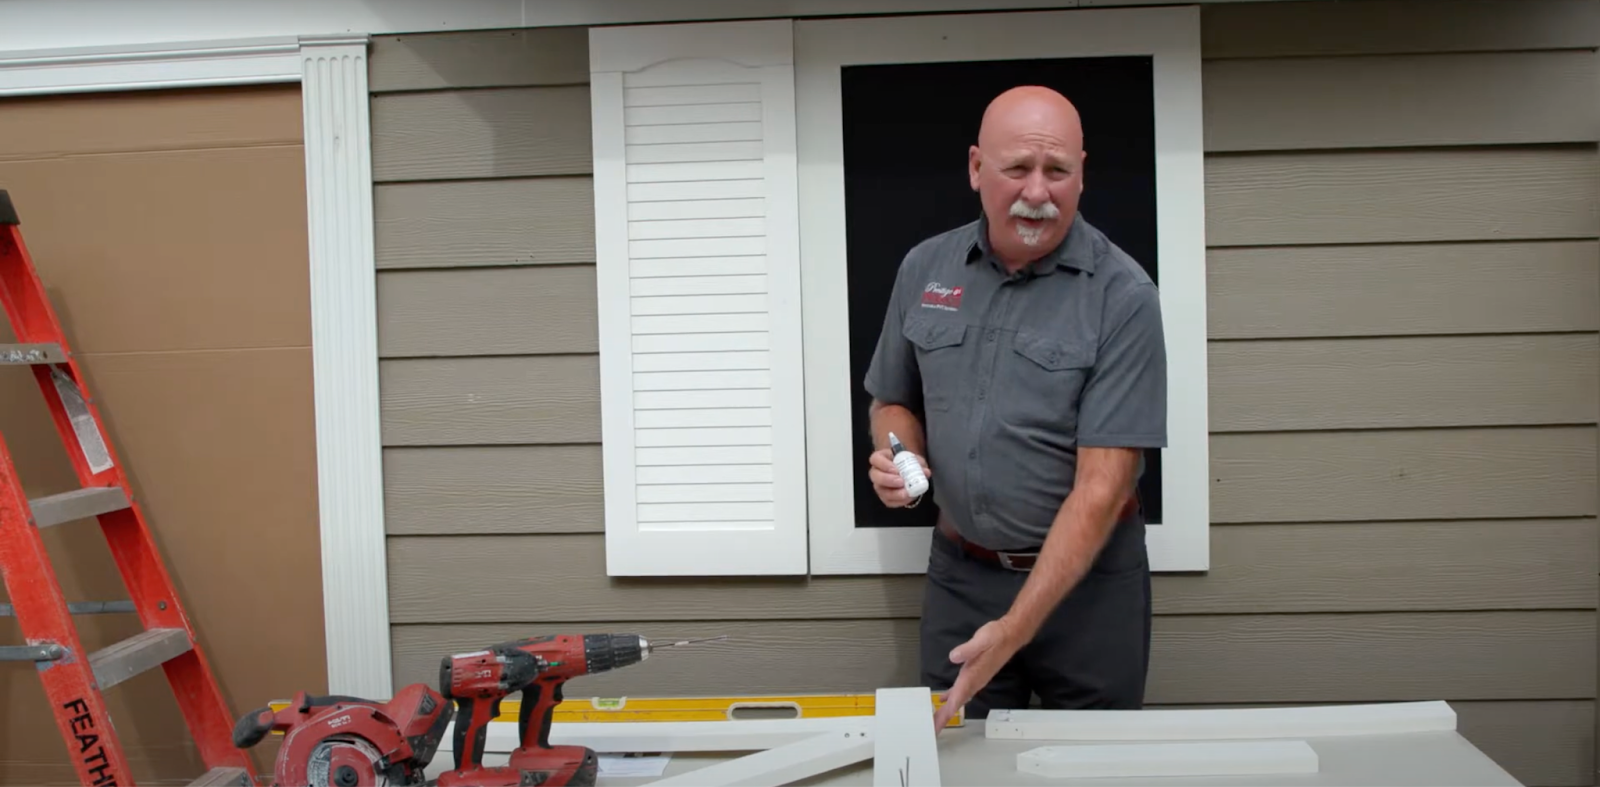
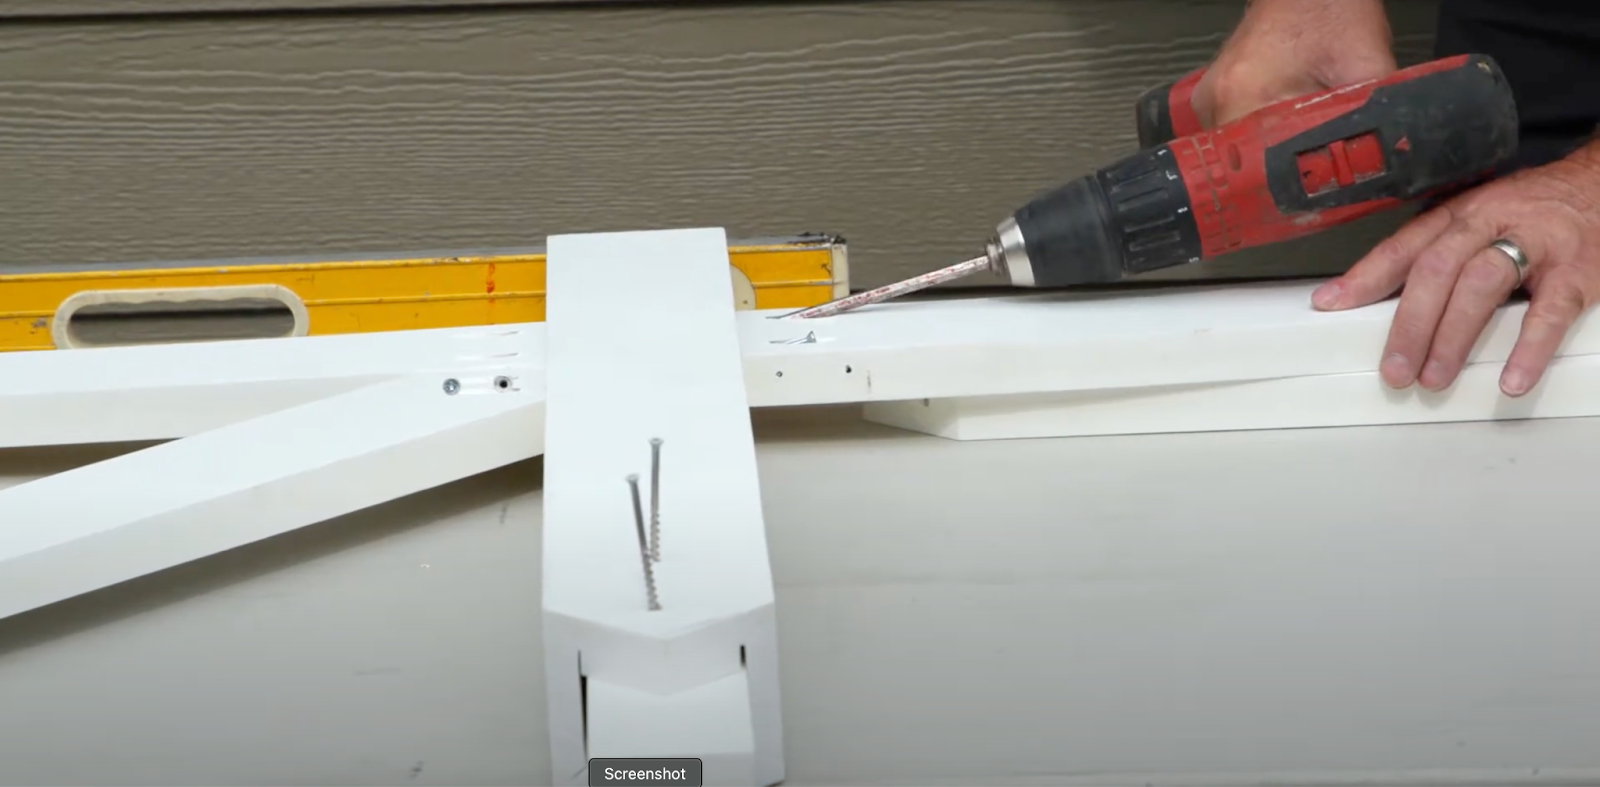
Step 3: Apply Adhesive
Apply PVC adhesive to the faces that will connect to the side of the posts. This will create a permanent bond, while the screws serve as temporary reinforcement.
Applying adhesive is important in securing the gable detail components together, ensuring a long-lasting and durable installation. PVC adhesive provides a strong bond suitable for outdoor applications.
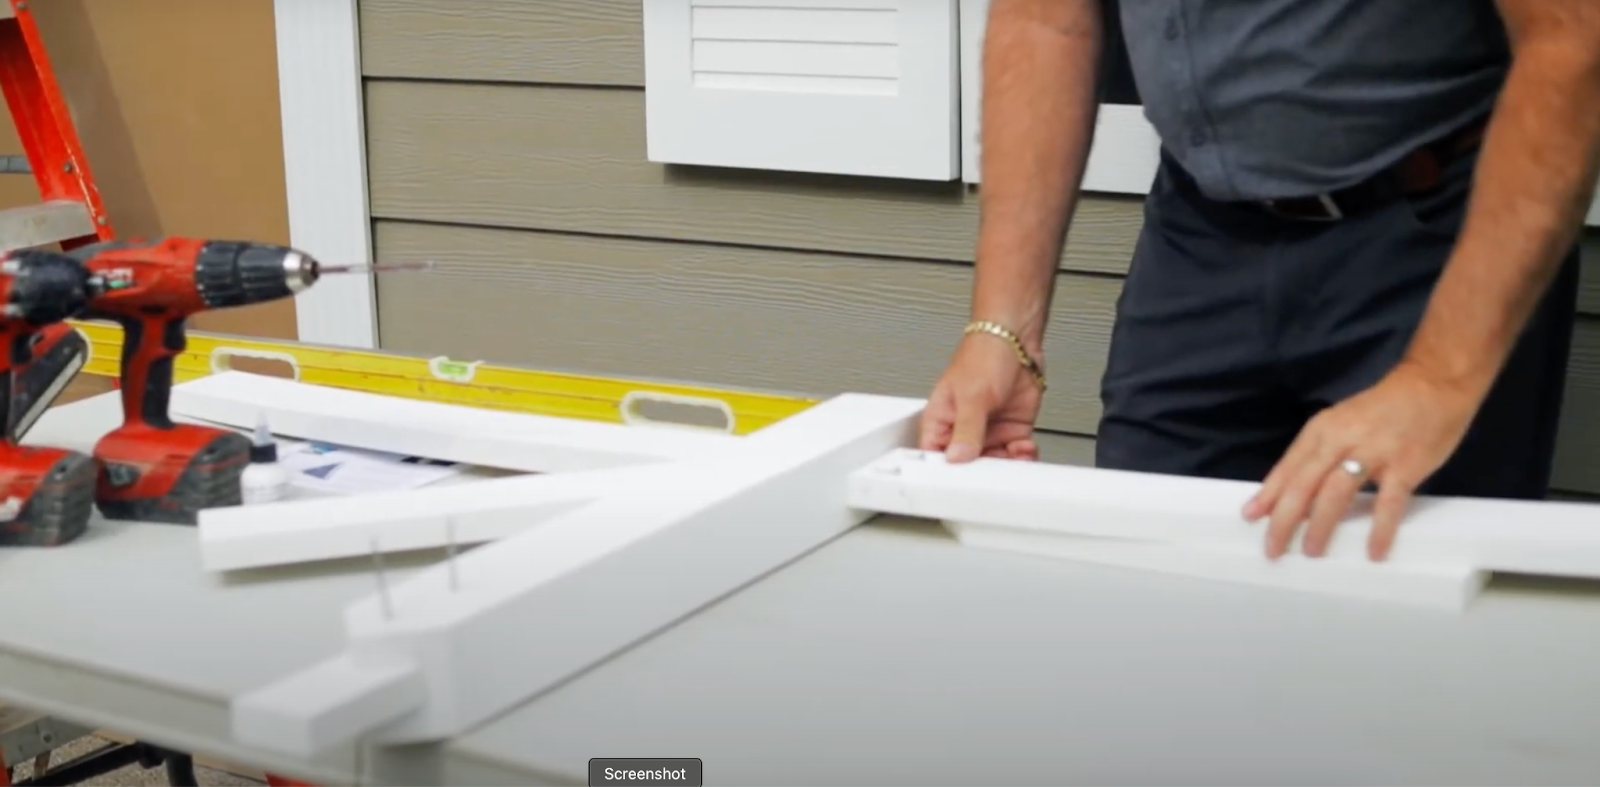
Step 4: Position the Gable Detail
To hold the gable detail in place, use one of the included accessories to support it. This will help keep it securely positioned while you prepare to drill the screws.
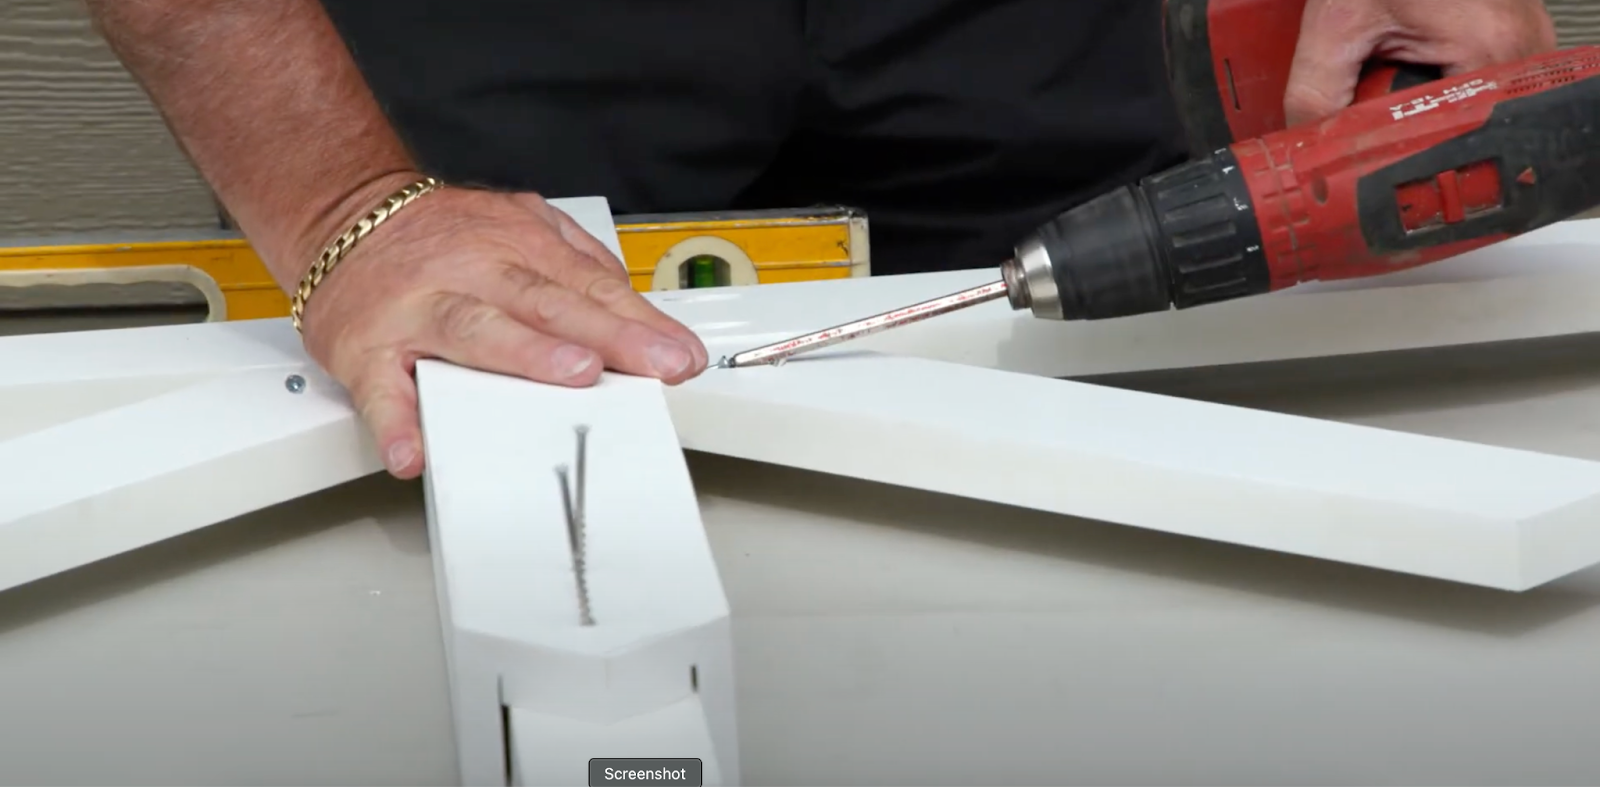
Step 5: Drive Screws To Secure
Begin securing the gable detail by starting with the screws. Align each screw with the pre-drilled holes and drive it in using your screw gun, applying steady pressure until it is fully tightened and creates a firm connection. Ensure the gable detail remains level and aligned as you insert each screw.
Repeat this process for all remaining screws, ensuring each one is properly seated and the gable detail stays securely in place. This will help maintain the structural integrity of the installation and ensure a solid attachment to the building.
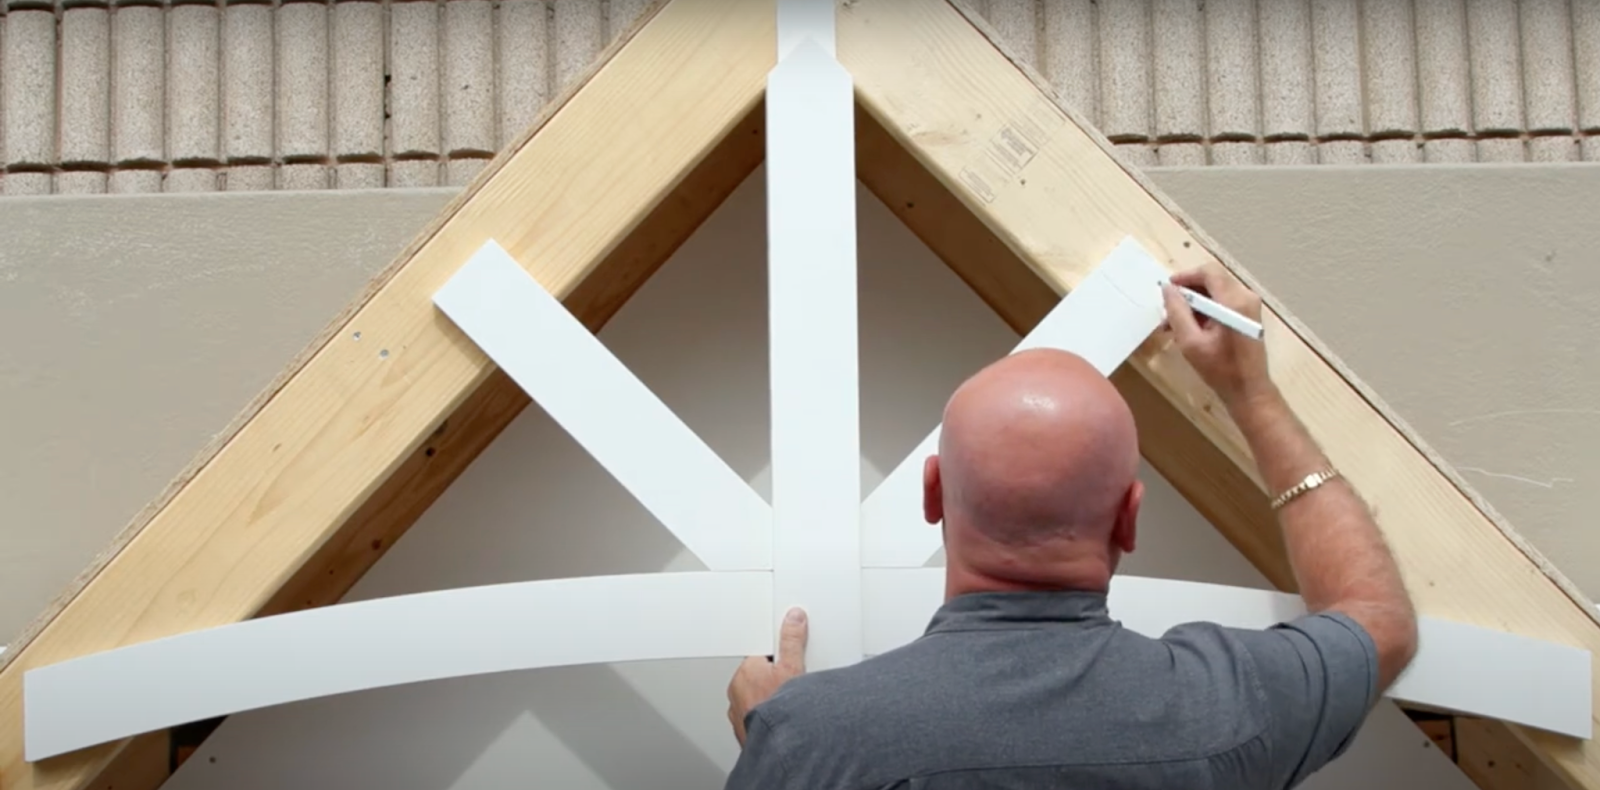
Step 6: Mark the top and Check Reference Points
The gable detail features a pre-cut pitch for a precise, snug fit against the underside of the structure. This design simplifies installation by aligning seamlessly with your building’s architecture.
Mark the top of the gable detail on both the front and back to serve as reference points. These marks are crucial for ensuring correct alignment and avoiding errors.
With the marks in place, trim any excess material from the tails on the backside of the gable detail. This ensures a clean, professional finish and a seamless fit with the structure, eliminating overhangs or protrusions that could affect the appearance and stability of the installation.
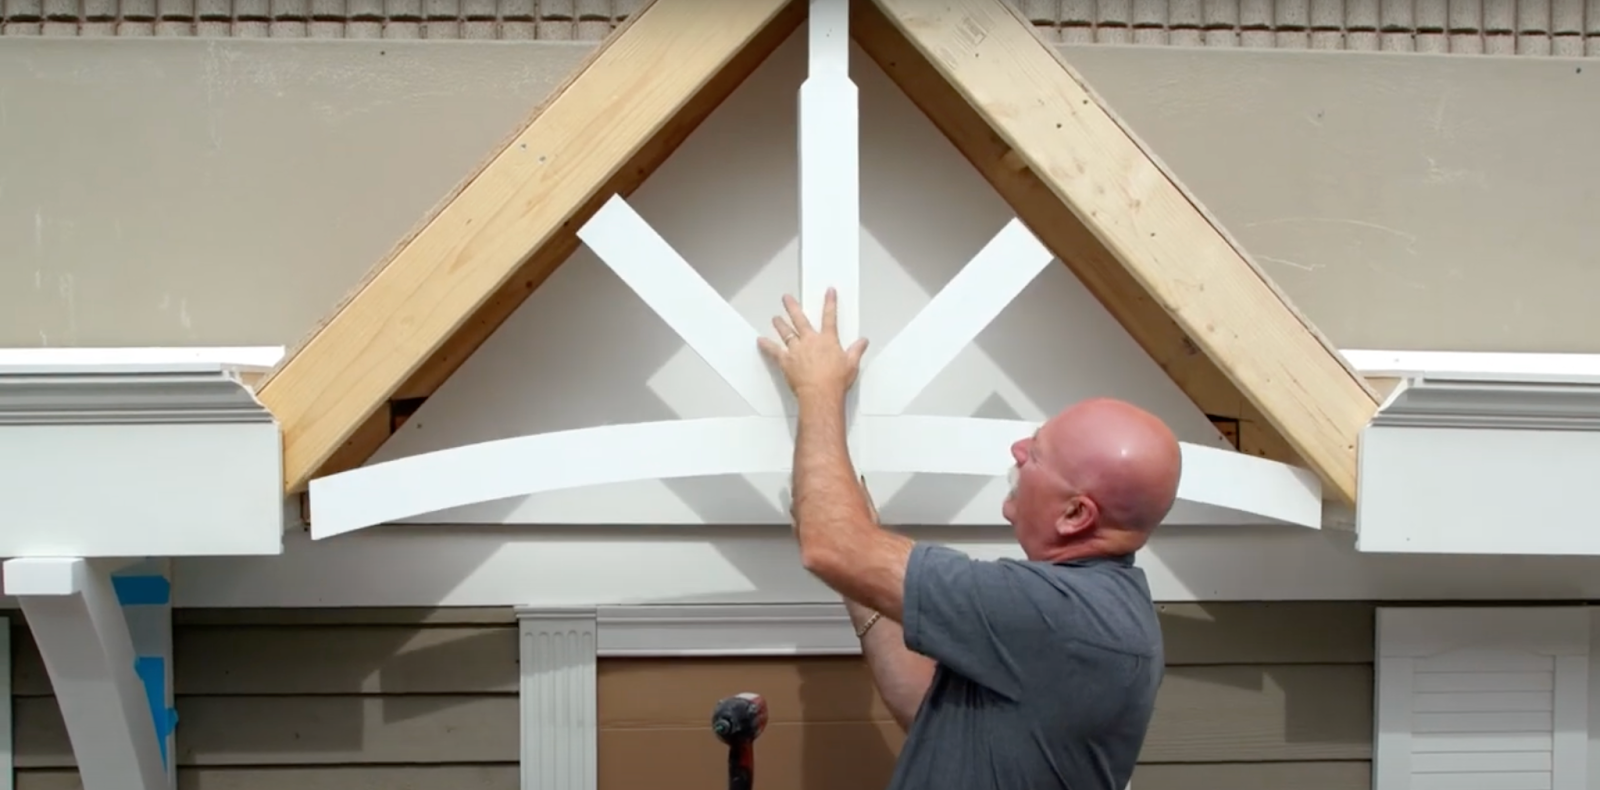
Step 7: Trial Fit the Gable
Carefully position the gable detail by hanging it over the front of the installation area. Take a moment to visually align it, ensuring that it fits well and meets your design expectations. As you do this, use a level to check that the gable detail is properly aligned and straight.
If you notice any parts of the gable detail interfering with the structure behind it, you may need to make some adjustments. Examine the areas where the gable detail meets or overlaps with the existing structure. Identify any sections that are in contact with or obstructed by the structure.
To address these issues, trim any excess material or adjust the fit as needed. This might involve carefully cutting away portions of the gable detail or reshaping it to ensure a smooth and unobstructed installation.
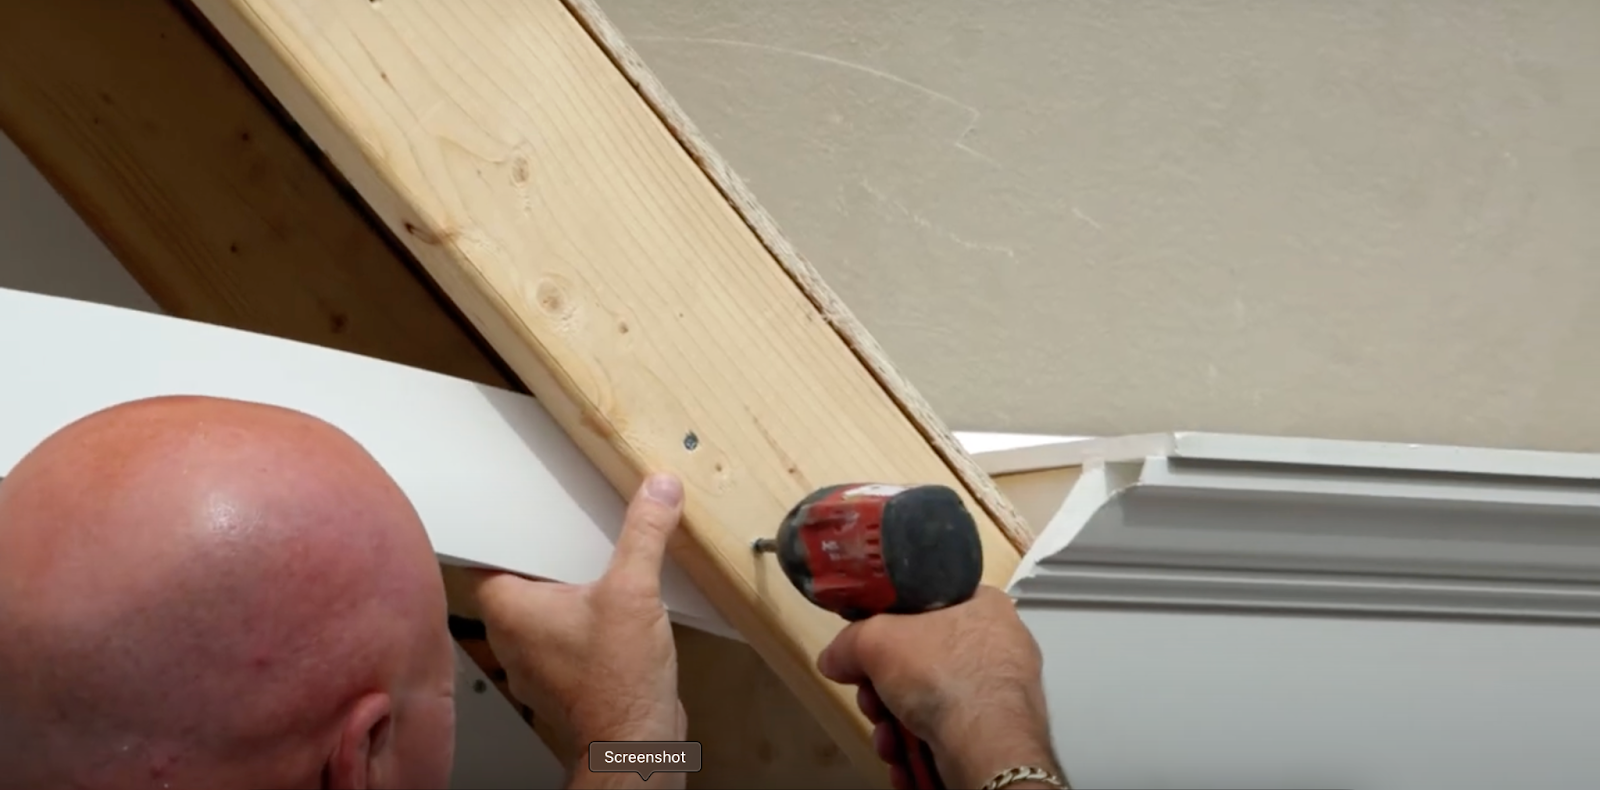
Step 8: Assemble the Gable
It’s assembly time! We’ve made this step easier by providing the installation stem so you don’t have to hold the whole gable in position.
Screw the backside of the installation stem. Then, match up your pre-determined marks, level up the post, and slide it into full connection.
Finally, insert the two back screws to secure it.
Step 9: Check Vertical Alignment
Ensure that the gable detail is perfectly vertical by checking its stance with a level.
Once you’re satisfied with the alignment, insert two screws from the front into each section of the gable. These screws will hold the gable in place and will later be covered by aluminum fascia for a finished look.
By following these steps, you’ll have a beautifully installed gable detail that enhances the look of your home. Happy building!
Start Your DIY Journey with Prestige DIY Products!
Ready to elevate your home with stunning new gables? At Prestige DIY Products, we offer top-quality materials and straightforward instructions to ensure your DIY project is a success.
Explore our wide selection of gable options and discover everything you need to achieve a professional finish with ease. Let Prestige DIY Products guide you through your home improvement journey with confidence. Contact us today to get started!


